
Add 3D objects in Keynote on iPhone
3D objects are three-dimensional models that simulate natural lighting, shading, and texture effects. You can add 3D objects created with 3D software or 3D scanning in the USDA, USDC, and USDZ file formats to your presentation. After you add a 3D object, you can resize it, play its embedded animation, and rotate it along its x, y, and z axes.

Note: If a presentation that contains 3D objects is exported to another file format, or opened in Keynote 13.1 or earlier, Keynote for iCloud, or the Preview app, the 3D objects appear as 2D objects.
Add or replace a 3D object
Go to the Keynote app
 on your iPhone.
Open a presentation, tap
 in the toolbar, tap
  , then tap Choose File.
Navigate to the 3D object, tap to select it, then tap Open.
The 3D object appears on the slide with
 in the center. If the 3D object contains an embedded animation,
  appears in the lower-right corner of the object.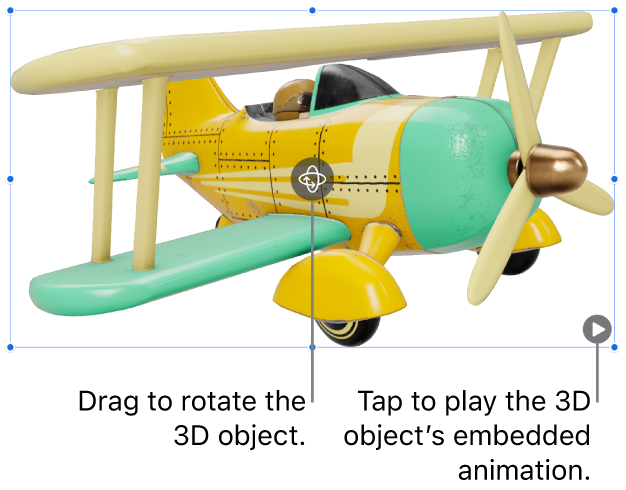
To replace the 3D object, tap to select the object, tap
 , tap the 3D Object tab, then tap Replace. Navigate to the 3D object you want, then tap it.
You can also copy and paste 3D objects from another Keynote presentation or app. To learn more, see Copy text and objects between Keynote and other apps.
Edit a 3D object
When you add a 3D object to a presentation, you can rotate it along its x, y, and z axes. You can also resize a 3D object proportionally to make it larger or smaller without changing its shape. If a 3D object contains an embedded animation, you can play and pause the animation.
Go to the Keynote app
on your iPhone.Open a presentation with a 3D object, then tap the object to select it.
To rotate the 3D object, do one of the following:
Drag
in the center of the object.Tap
, tap 3D Object, then tap the + or – buttons to rotate the object around its x, y, or z axes.Tap
, tap 3D Object, then tap one of the degree value fields to the left of the + and – buttons. To rotate the object around the chosen axis, drag the wheel or enter a value to specify the angle, then tap Done.
Tip: To set all x, y, and z values to 0 degrees, tap
, tap 3D Object, then tap Reset Rotation.To resize the 3D object, drag any of the selection handles surrounding the 3D object. Or tap
, tap Arrange, tap W or H, then enter new values for Width and Height.If the 3D object contains an embedded animation, tap
in the lower-right corner of the object to play the animation. Tap  to stop the animation.
You can also align a 3D object with another object on a slide, or specify its location using its x and y coordinates. To learn more, see Position and align objects.
View a 3D object
After you add a 3D object to a slide, you can view it in 3D on compatible iPad and iPhone models.
Go to the Keynote app
on your iPhone.Open a presentation with a 3D object.
To view the 3D object, do one of the following:
In reading view: Tap
 in the controls below the 3D object.
In editing view: Tap the 3D object to select it, tap
, tap 3D Object, then tap View in 3D.
Add a description to a 3D object
Descriptions are read by assistive technology (for example, VoiceOver) when someone uses that technology to access your presentation. Descriptions aren’t visible anywhere in your presentation.
Go to the Keynote app
on your iPhone.Open a presentation with a 3D object.
Tap the 3D object to select it, tap
, then tap 3D Object.Tap Description, tap the text box, then enter your text.
If you export your presentation as a PDF, descriptions are still readable by assistive technology. See Export to PowerPoint or another file format.
To add a caption or title to your 3D object, see Add a caption or title to objects.
You can use a Magic Move transition to create the appearance of a 3D object moving or rotating on its own when you change slides. To learn more, see Add a Magic Move transition.