GitHub で AWS CloudWatch アラームをデプロイする

2021 年にアトラシアンに入社した Warren は、元開発者でしたがテクニカル エバンジェリストに転向しました。メインフレーム上で稼働する COBOL 通信ソフトウェアから AWS の最新のクラウド インフラストラクチャまで、あらゆる業務に携わっています。Warren はテクノロジーに情熱を注ぎ、機械学習の研究に関する経歴を持っています。テクニカル エバンジェリストとして、デモ、執筆、動画を通じて、アトラシアン製品とパートナーの統合の機能についての認知を高めています。休みの日には、ブラジリアン柔術を熱心に練習しています。
アトラシアンのチームは、Jira Software とさまざまな接続ツールを使用してアプリの開発、デプロイ、管理方法を説明するために、機械学習によって画像にラベルを添付する、AWS 上に構築されたシンプルなデモ アプリ ImageLabeller を作成しました。
このページでは、AWS SageMaker の定義済みモデルを設定する方法について説明します。これは、ImageLabeller が画像を正常に処理するために必要な前提条件です。はじめに、ImageLabeller アーキテクチャ ページと ImageLabeller を GitHub でデプロイするページをお読みの上、背景を確認することをお勧めします。
Opsgenie 統合用のアラーム リポジトリを追加する
Jira に移動して、AWS CloudWatch アラーム リポジトリを GitHub に追加するための新しい Jira 課題を作成します。この例では、Jira 課題 ID は IM-10 です。

GitHub に移動して [新規] をクリックします。[所有者] に適切な組織を選択します。[リポジトリを作成] をクリックして続行します。

[Settings]、[Secrets] の順にクリックします。AWS アクセス キー ID を AWS_ACCESS_KEY_ID として、AWS シークレット アクセス キーを AWS_SECRET_ACCESS_KEY として追加します。

ターミナルで CloudWatchAlarms リポジトリに移動して、次のコマンドを実行して AWS CloudFormation コードを GitHub にプッシュします。
1git add --all
2git commit -m "IM-10 add CloudWatchAlarms to github"
3git remote add origin git@github.com:PmmQuickStartGuides01/CloudWatchAlarms.git
4git branch -m mainline
5git push -u origin mainline
Alarms template.yml
1Description: 'A description'
2
3Resources:
4  OpsGenieSNS:
5    Type: AWS::SNS::Topic
6    Properties:
7      DisplayName: 'Opsgenie'
8      Subscription:
9        - Endpoint: 'https://api.opsgenie.com/v1/json/cloudwatch?apiKey=a4449509-6998-4d55-841d-2e6b363520c7'
10          Protocol: 'HTTPS'
11      TopicName: 'Opsgenie'
12
13  SubmitImageLambdaAlarm:
14    Type: AWS::CloudWatch::Alarm
15    Properties:
16      AlarmActions:
17        - !Ref 'OpsGenieSNS'
18      AlarmDescription: 'SubmitImage Too Many Invocations'
19      ComparisonOperator: 'GreaterThanThreshold'
20      Dimensions:
21        - Name: FunctionName
22          Value: !ImportValue 'SubmitImageFunctionName'
23      EvaluationPeriods: 1
24      MetricName: 'Invocations'
25      Namespace: 'AWS/Lambda'
26      Period: 60
27      Statistic: 'Sum'
28      Threshold: 10
SNS トピック サブスクリプション エンドポイントを、Opsgenie からコピーしたエンドポイント URL に設定します。SubmitImageLambdaAlarm は、SubmitImage AWS Lambda によって生成された単一のメトリックを監視します。呼び出しが 10 より多い場合は、1 分でアラームが鳴ります。
AWS にデプロイするための GitHub アクション
ターミナルの CloudWatchAlarms リポジトリに移動して、Jira 課題 ID にちなんだ名前のブランチ、.github/workflows ディレクトリの順に作成します。
1git checkout -b IM-10
2mkdir -p .github/workflows && cd .github/workflows
次の yaml で deploy-test-staging.yml を作成します。これによって、メインライン以外のブランチに対するプッシュ中に実行されるテスト環境とステージング環境のデプロイ ワークフローが定義されます。
1name: deploy-cloudwatchalarms-test-staging
2on:
3  push:
4    branches:
5      - '*'
6      - '!mainline'
7
8jobs:
9  deploy-us-west-1:
10    runs-on: ubuntu-latest
11    outputs:
12      env-name: ${{ steps.env-name.outputs.environment }}
13    steps:
14      - name: Checkout code
15        uses: actions/checkout@v2
16      - name: Configure AWS credentials
17        id: creds
18        uses: aws-actions/configure-aws-credentials@v1
19        with:
20          aws-access-key-id: ${{ secrets.AWS_ACCESS_KEY_ID }}
21          aws-secret-access-key: ${{ secrets.AWS_SECRET_ACCESS_KEY }}
22          aws-region: "us-west-1"
23      - name: Deploy to AWS CloudFormation
24        uses: aws-actions/aws-cloudformation-github-deploy@v1
25        with:
26          name: OpenDevOpsAlarms
27          template: template.yml
28          no-fail-on-empty-changeset: "1"
29
30  deploy-us-east-2:
31    runs-on: ubuntu-latest
32    needs: deploy-us-west-1
33    steps:
34      - name: Checkout code
35        uses: actions/checkout@v2
36      - name: Configure AWS credentials
37        id: creds
38        uses: aws-actions/configure-aws-credentials@v1
39        with:
40          aws-access-key-id: ${{ secrets.AWS_ACCESS_KEY_ID }}
41          aws-secret-access-key: ${{ secrets.AWS_SECRET_ACCESS_KEY }}
42          aws-region: "us-east-2"
43      - name: Deploy to AWS CloudFormation
44        uses: aws-actions/aws-cloudformation-github-deploy@v1
45        with:
46          name: OpenDevOpsAlarms
47          template: template.yml
48          no-fail-on-empty-changeset: "1"
次に、次の yaml で deploy-prod.yml を作成します。これによって、プル リクエストが変更をメインラインにマージする際に実行される本番環境のデプロイ ワークフローが定義されます。
1name: deploy-cloudwatchalarms-prod
2on:
3  pull_request:
4    branches:
5      - mainline
6
7jobs:
8  deploy-us-west-2:
9    runs-on: ubuntu-latest
10    outputs:
11      env-name: ${{ steps.env-name.outputs.environment }}
12    steps:
13      - name: Checkout code
14        uses: actions/checkout@v2
15      - name: Configure AWS credentials
16        id: creds
17        uses: aws-actions/configure-aws-credentials@v1
18        with:
19          aws-access-key-id: ${{ secrets.AWS_ACCESS_KEY_ID }}
20          aws-secret-access-key: ${{ secrets.AWS_SECRET_ACCESS_KEY }}
21          aws-region: "us-west-2"
22      - name: Deploy to AWS CloudFormation
23        uses: aws-actions/aws-cloudformation-github-deploy@v1
24        with:
25          name: OpenDevOpsAlarms
26          template: template.yml
27          no-fail-on-empty-changeset: "1"
28
29  deploy-ca-central-1:
30    runs-on: ubuntu-latest
31    needs: deploy-us-west-2
32    steps:
33      - name: Checkout code
34        uses: actions/checkout@v2
35      - name: Configure AWS credentials
36        id: creds
37        uses: aws-actions/configure-aws-credentials@v1
38        with:
39          aws-access-key-id: ${{ secrets.AWS_ACCESS_KEY_ID }}
40          aws-secret-access-key: ${{ secrets.AWS_SECRET_ACCESS_KEY }}
41          aws-region: "ca-central-1"
42      - name: Deploy to AWS CloudFormation
43        uses: aws-actions/aws-cloudformation-github-deploy@v1
44        with:
45          name: OpenDevOpsAlarms
46          template: template.yml
47          no-fail-on-empty-changeset: "1"
48
49  deploy-us-east-1:
50    runs-on: ubuntu-latest
51    needs: deploy-ca-central-1
52    steps:
53      - name: Checkout code
54        uses: actions/checkout@v2
55      - name: Configure AWS credentials
56        id: creds
57        uses: aws-actions/configure-aws-credentials@v1
58        with:
59          aws-access-key-id: ${{ secrets.AWS_ACCESS_KEY_ID }}
60          aws-secret-access-key: ${{ secrets.AWS_SECRET_ACCESS_KEY }}
61          aws-region: "us-east-1"
62      - name: Deploy to AWS CloudFormation
63        uses: aws-actions/aws-cloudformation-github-deploy@v1
64        with:
65          name: OpenDevOpsAlarms
66          template: template.yml
67          no-fail-on-empty-changeset: "1"
フィーチャー ブランチにプッシュ
コマンド ラインから次のコマンドを実行して、コードを CloudWatchAlarms リポジトリの IM-10 ブランチにプッシュします。
1git add --all
2git commit -m "IM-10 add github actions to CloudWatchAlarms"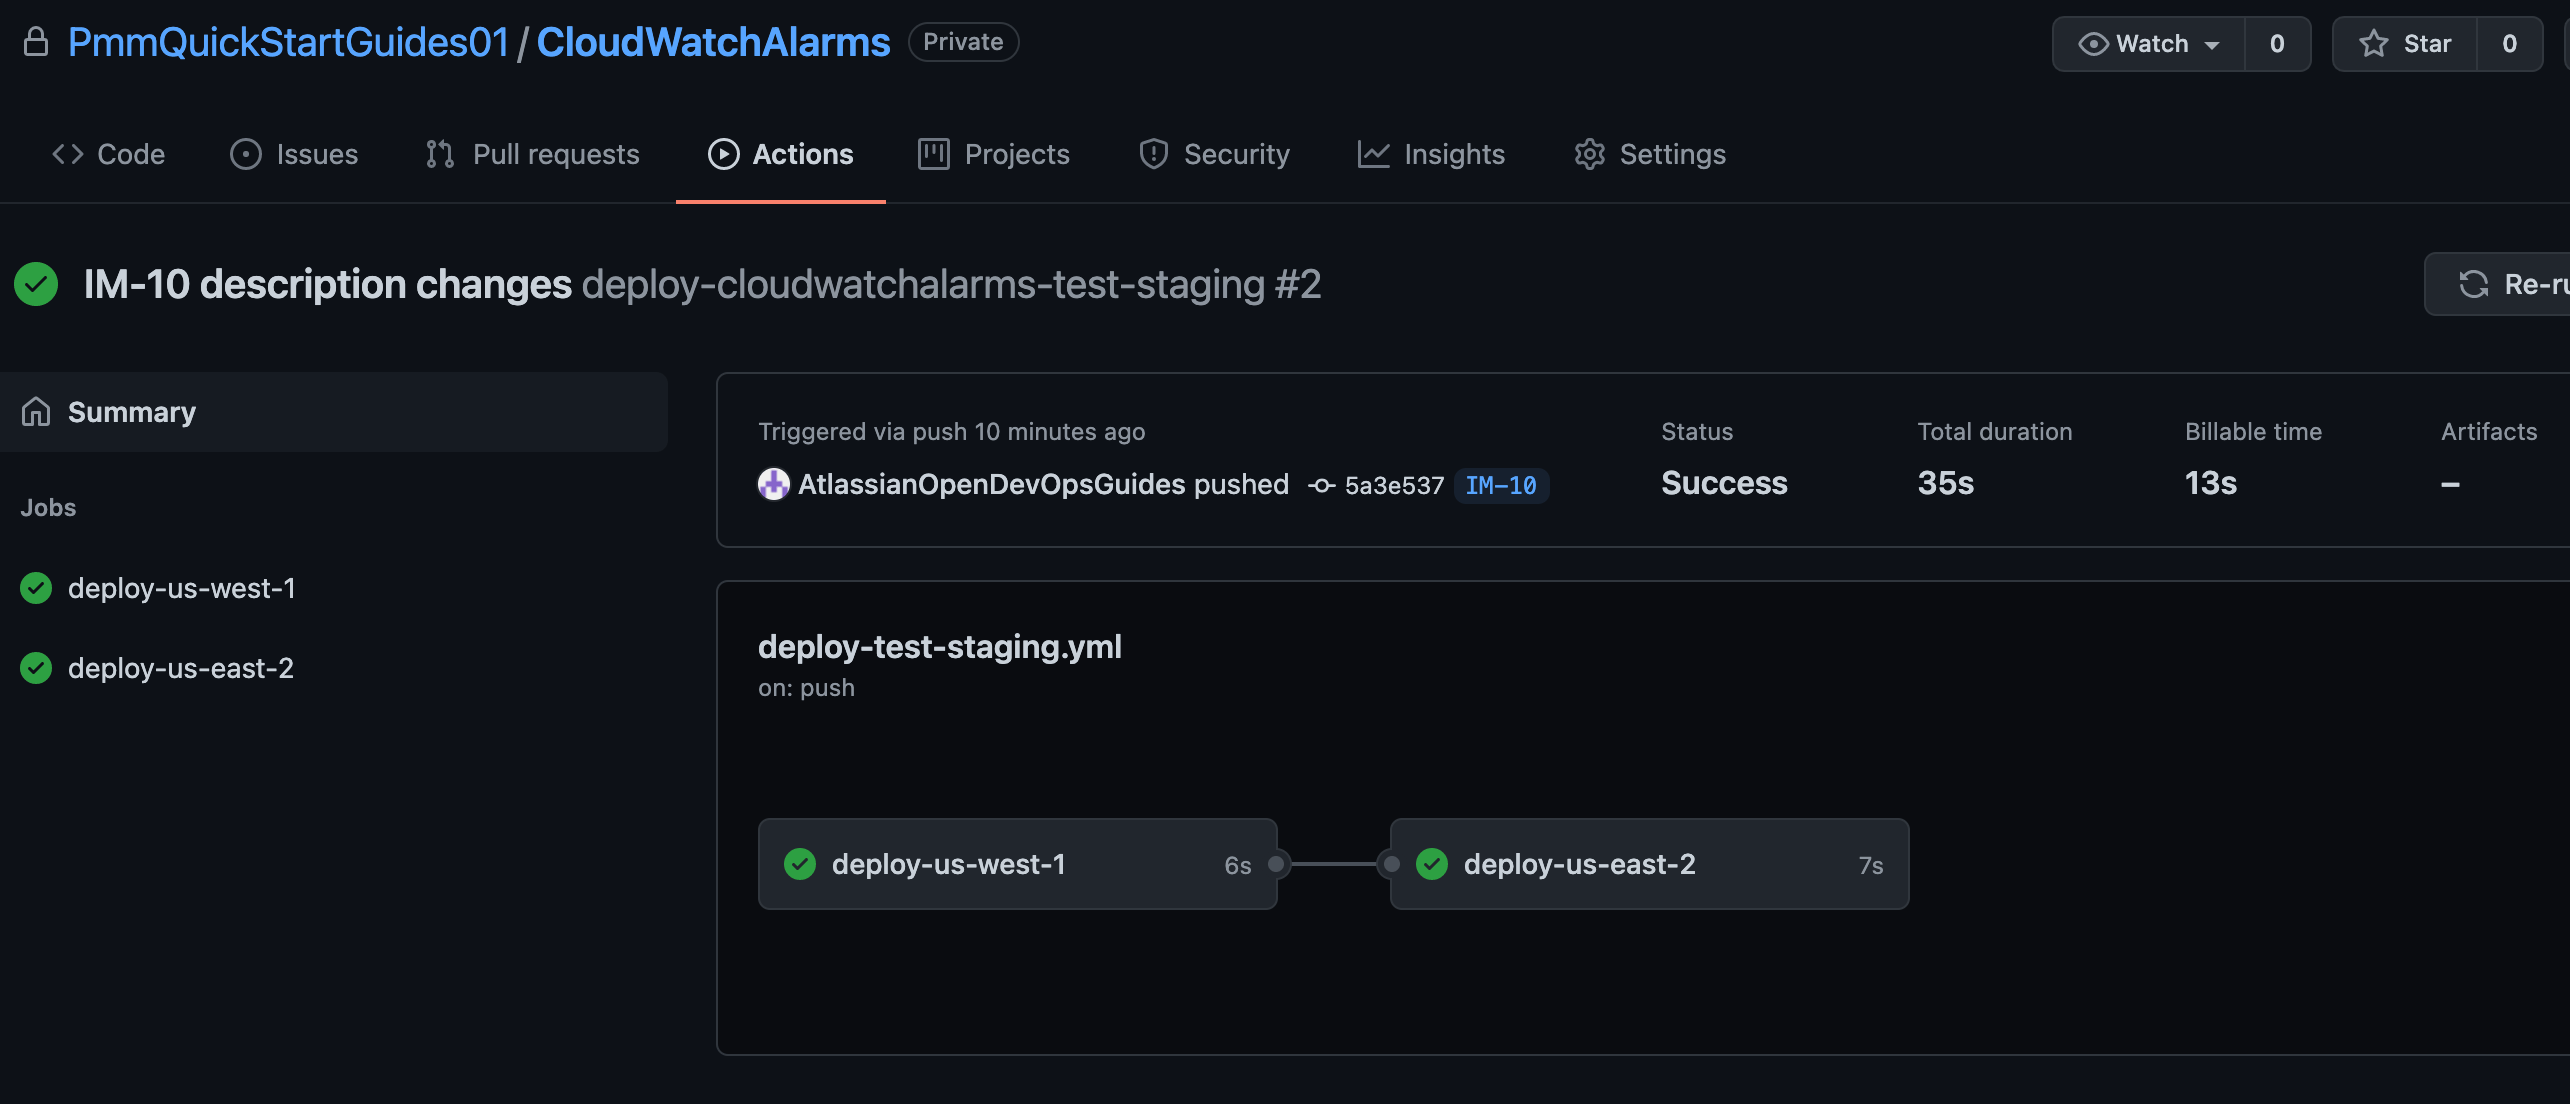
3git push -u origin IM-10[アクション] をクリックして、実行中のワークフローを表示します。
プルリクエストを作成する
[プル リクエストの作成] をクリックして、メインラインにマージします。

[アクション] をクリックして、本番環境のデプロイを監視します。

アラームのテスト
先ほど設定した AWS CloudWatch アラームをトリガーするか、[アラートを作成] をクリックしてアラートを生成します。

Slack をチェックして、通知が表示されたことを確認します。

おめでとうございます、これで完了です。ImageLabeller が稼動しています。