Final Cut Pro User Guide for Mac
- Welcome
- What’s new
-
- Intro to importing media
- If it’s your first import
- Organize files during import
-
- Import from Image Playground
- Import from iMovie for macOS
- Import from iMovie for iOS or iPadOS
- Import from Final Cut Pro for iPad
- Import from Final Cut Camera
- Import from Photos
- Import from Music
- Import from Apple TV
- Import from Motion
- Import from GarageBand and Logic Pro
- Import using workflow extensions
- Record into Final Cut Pro
- Memory cards and cables
- Supported media formats
-
- Intro to effects
-
- Intro to transitions
- How transitions are created
- Add transitions and fades
- Quickly add a transition with a keyboard shortcut
- Set the default duration for transitions
- Delete transitions
- Adjust transitions in the timeline
- Adjust transitions in the inspector and viewer
- Merge jump cuts with the Flow transition
- Adjust transitions with multiple images
- Modify transitions in Motion
- Add adjustment clips
-
- Add storylines
- Use the precision editor
- Conform frame sizes and rates
- Use XML to transfer projects
-
- Intro to sharing projects
- Share to Apple devices
- Share on the web
- Send a video frame to Pixelmator Pro
- Share in email
- Share stereo or spatial video
- Batch sharing
- Share using Compressor
- Create share destinations
- Change metadata for shared items
- View the status of shared items
- Speed up exports with simultaneous processing
- Glossary
- Copyright and trademarks
Generate subtitles automatically in Final Cut Pro for Mac
You can use Generate Captions in Final Cut Pro for Mac to automatically detect and transcribe speech in your video, creating subtitles you can customize to make accessible, ready-to-share content for social media and video platforms.
Note: The Generate Captions feature requires a Mac with Apple silicon and is available in U.S. English only.

Add subtitles automatically
In Final Cut Pro, select one or more clips in the timeline that contain speech.
Do one of the following:
Control-click the selection, then choose Generate Captions > Subtitles.
Choose Edit > Generate Captions > Subtitles (or press Shift-Command-S).
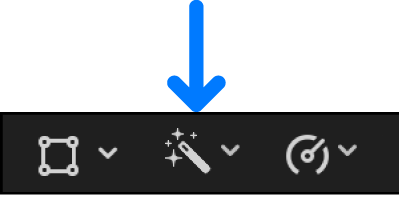
Click the Enhancements pop-up menu below the viewer, then choose Generate Captions > Subtitles.
Final Cut Pro transcribes each clip in the selection and automatically connects the resulting title clips to the clips they were transcribed from. Each title clip starts and ends in sync with the spoken words. Automatically generated subtitles are standard title clips created using the default Subtitle title (in the Subtitles category of the Titles and Generators sidebar). See Add titles.

If you’re creating subtitles for clips that have split edits (J-cuts and L-cuts), Final Cut Pro connects closed caption clips to adjacent clips that overlap the transcribed audio.
Note: If you’re creating subtitles automatically for the first time, Final Cut Pro downloads the language model and then creates the subtitles. The download happens only once (an internet connection is required).
The Subtitles role is automatically assigned to all subtitles created using Generate Captions. See Intro to roles.
Adjust subtitles
When you use Generate Captions, subtitles are created using a default title named Subtitle, which has unique settings designed for captions, including animation and vertical video options for social media. The Subtitle title is available in the Subtitles category of the Titles and Generators sidebar.

In Final Cut Pro, add subtitles using the Generate Captions feature.
Select one or more subtitle clips in the timeline.
Tip: To select all the subtitles in the timeline, press Command-A. To select everything in the timeline, press Command-A again.
To open the inspector, do one of the following:
Choose Window > Show in Workspace > Inspector (or press Command-4).
Click the Inspector button on the right side of the toolbar.

To open the Title inspector, click the Title button at the top of the inspector.

Tip: Double-click the top bar of the inspector to switch between half-height view and full-height view.
Adjust any of these subtitle-specific settings:
Animation Style: Choose how the subtitle text becomes visible:
None: No animation is applied.
Fade: Words fade up one at a time.
Scale: Words appear large, then scale down, one at a time.
Highlight: Words are highlighted in color, one at a time.
Fill: Words are filled in color, one at a time, until every word in the subtitle is that color.
Animate By: Choose how the animation is applied:
Character: Animates one letter at a time.
Word: Animates one word at a time.
Line: Animates one line at a time.
All: In multiple-line subtitles, animates all lines at once.
Vertical Social Media Safe: For vertical (9:16) video, select the checkbox to position the subtitle in the viewable area of the video on most social media platforms.
To change standard title settings, such as the font, size, color, and more, see Adjust titles, Text inspector controls, and Apply preset text styles.
Download this guide: PDF