Create new content items with Rovo
Generate Confluence content quickly using Create with Rovo. Describe what you need — add files or links for context — and Rovo creates a draft for you. You can then review and edit the content with built-in tools like chat, AI suggestions, and quick actions.
Create with Rovo saves you time and makes it easier to get started with new pages, live docs, whiteboards, or databases.
Start creating with Rovo
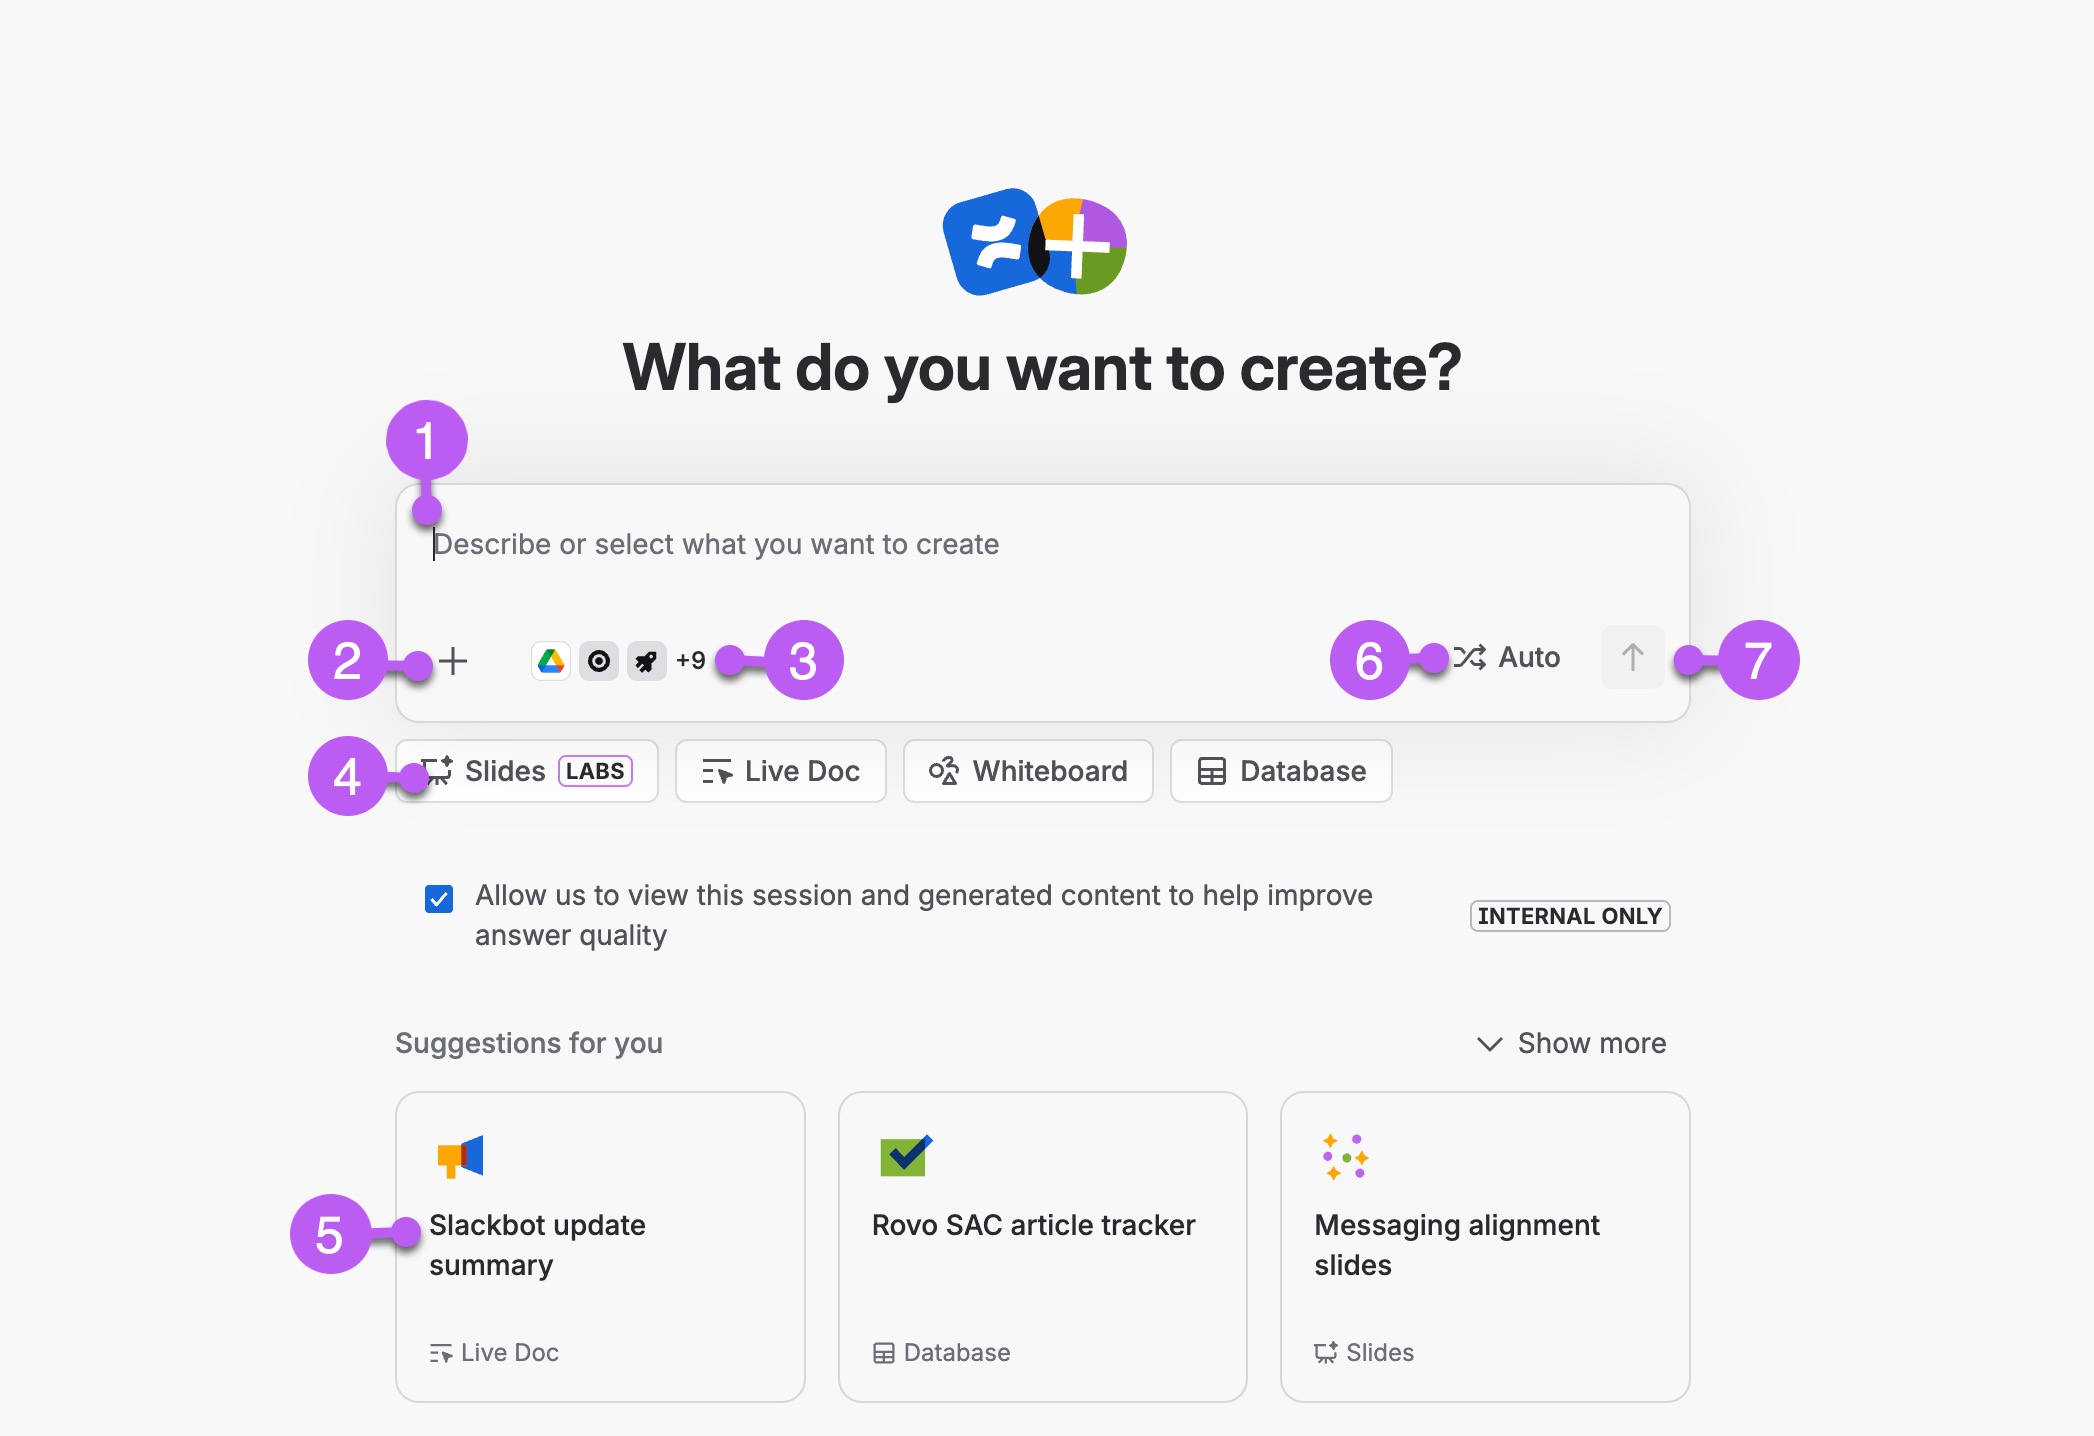
To get started, select Create in the top navigation. Then select Create with Rovo. All you need to do is add a prompt.
What’s a prompt?
A prompt is a collection of words, phrases, or sentences in conversational language. It tells an AI tool (like Rovo) exactly what you want it to do and helps it generate the best result. We recommend being as clear, simple, and specific as possible when writing a prompt.
You can always attach links to other content, mention relevant people, and add more context to your initial prompt or throughout your conversation with Rovo.
Examples:
“Create slides based on this page and our project plan.”
“Draft a project kickoff plan for our new marketing campaign.”
“Summarize the Q3 engineering retrospective.”
Start with a simple description of what you need.
Select Add ( icon) to include additional context with:
Files
Links
A template
An @mention of a person.
Additional formatting
Choose which data sources you want Rovo to use.
Select a content type to get started. This is optional. You can tell Rovo to
Create with Rovo will suggest starting prompts based on what it already knows about your work. Select More ideas to expand these suggestions.
Select Auto to change how Rovo answers.
When you’ve added everything, select Submit ().
The preview area
When you submit your prompt, Rovo works on an initial draft of your content in the preview area, which takes up all of your screen. The preview area can contain written content, whiteboard elements, or a proposed draft of a database. Unlike when you create content items directly, the contents of the preview panel have not yet been added to a space. Only you can see it until you select Add to Confluence.
When Rovo is done drafting your content, you can edit it directly or use Rovo chat to describe what you want to change, do, or know next.
Always review AI-generated content for accuracy before making it publicly accessible, especially for sensitive or customer-facing documentation.
When you Create with Rovo, edit your previewed content:
Change the text yourself
Use the
/slash command to insert elements
Select the content you want to edit, then use the AI actions displayed:
Ask Rovo lets you prompt a specific section
More AI actions in the dropdown lets you choose from quick ways to transform content
Improve writing to improve the selection
Continue the chat with Rovo
Use the open chat on the right or select Ask Rovo in the toolbar to tell Rovo what changes you want. For example, you could ask Rovo to “Change all headings to sentence case”.
Add your content to a Confluence space
When your content preview is ready, add it to a space:
Select Add to Confluence.
Choose any space and parent item.
If you’ve created written content, you can add it as a live doc, a draft page, or a whiteboard. Live docs, whiteboards, databases allow real-time editing, while pages must be published.
Select Add. You can always continue to make edits to your content once it’s added to a space, including switching between live doc and page or converting it to a blog post.
Use chat get to back to Rovo-created content
Anything you Create with Rovo is saved as a preview. You can find your way back to it anytime, even if you navigate away or close your browser.
To reopen content you’ve previously created with Rovo:
Open Rovo chat by selecting Ask Rovo at the top right of your screen.
Select Menu at the top left and then find the previous prompt you submitted in chat history. Select it.
From the chat panel, select the preview card to reopen it.
Was this helpful?