Final Cut Pro User Guide for Mac
- Welcome
- What’s new
-
- Intro to importing media
- If it’s your first import
- Organize files during import
-
- Import from Image Playground
- Import from iMovie for macOS
- Import from iMovie for iOS or iPadOS
- Import from Final Cut Pro for iPad
- Import from Final Cut Camera
- Import from Photos
- Import from Music
- Import from Apple TV
- Import from Motion
- Import from GarageBand and Logic Pro
- Import using workflow extensions
- Record into Final Cut Pro
- Memory cards and cables
- Supported media formats
-
- Intro to effects
-
- Intro to transitions
- How transitions are created
- Add transitions and fades
- Quickly add a transition with a keyboard shortcut
- Set the default duration for transitions
- Delete transitions
- Adjust transitions in the timeline
- Adjust transitions in the inspector and viewer
- Merge jump cuts with the Flow transition
- Adjust transitions with multiple images
- Modify transitions in Motion
- Add adjustment clips
-
- Add storylines
- Use the precision editor
- Conform frame sizes and rates
- Use XML to transfer projects
-
- Intro to sharing projects
- Share to Apple devices
- Share on the web
- Send a video frame to Pixelmator Pro
- Share in email
- Share stereo or spatial video
- Batch sharing
- Share using Compressor
- Create share destinations
- Change metadata for shared items
- View the status of shared items
- Speed up exports with simultaneous processing
- Glossary
- Copyright and trademarks
Add a shape mask in Final Cut Pro for Mac
A shape mask defines an area in the image so that you can apply color corrections either inside or outside that area. For example, you might want to emphasize an object in a shot by darkening the area around the object.

You can add multiple shape masks to define multiple areas, and you can also animate the shapes with keyframes so that they follow a moving object, or follow an area while a camera pans. For information about animating shape masks, see Animate an effect shape mask with keyframes. For information about working with keyframes, see Intro to video keyframing and Add video effect keyframes.
Add a color correction to a clip in the Final Cut Pro timeline, then select the clip.
Position the playhead in the timeline so that the clip appears in the viewer.
If the Color inspector isn’t already shown, do one of the following:
Choose Window > Go To > Color Inspector (or Press Command-6).
Click the Enhancements pop-up menu below the viewer and choose Show Color Inspector.
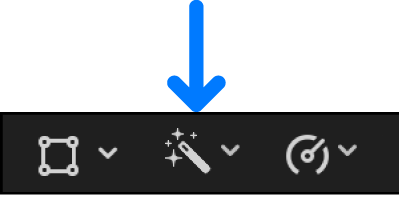
Click the pop-up menu at the top of the Color inspector and choose the color correction you want to mask.
At the top of the inspector, click the Add Shape Mask button
 to the right of the effect name.
The onscreen controls appear in the viewer, superimposed over the video image. By default, the shape mask is set to a partially feathered circle in the center of the frame. The Shape Mask item appears in the masks section at the bottom of the Color inspector.
Adjust the onscreen controls to specify which part of the video image is affected by the color correction.

Position the shape: Drag the center.
Adjust the shape’s width or height: Drag any of the four handles at the 90-degree points (top, bottom, left, or right) of the inner circle. You can hold down the Shift key while dragging to force all sides to scale proportionally.
Control the roundness of the shape: Drag the handle to the left of the inner circle’s top handle.
Rotate the shape: Drag the rotation handle (extending from the center).
Control the softness of the shape’s edge: Drag the outer circle. Setting the outer circle close to the inner circle creates a hard edge and an abrupt transition to the corrections you apply, and dragging the outer circle away from the inner circle creates a softer edge and a more gradual transition.
To show or hide the mask’s controls, click the Shape Mask Onscreen Controls button
to the right of the shape mask name in the Color inspector mask list.For information about viewing the mask, see Ways to view masks.
Do one of the following:
Apply a color correction to the shape area: Click Inside.

Apply a color correction to everything except the shape area: Click Outside.
You can make corrections to both the inside and outside areas of the mask—each area effectively has its own complete set of color correction controls. For example, you could click Inside and enhance the shape’s area, and then click Outside to change everything else.
As with any other masked clip effect, you can also invert (flop) the masked and unmasked areas of the shape mask. See Invert effect masks.
To correct color in the area isolated by the mask, adjust the controls of the color correction effect in the Color inspector.
For more information about the manual color correction effects, see Intro to color correction effects.
To add additional shape masks to the correction, repeat steps 5 and 6 above.
Another default shape appears in the viewer, and the original shape is dimmed. You can select and continue configuring the original shape by clicking its center.
For information about how masks can interact, see Combine multiple effect masks.
Download this guide: PDF