
Queue your songs in Music on Mac
Use the queue to view a list of upcoming songs, add songs and videos to play next or later, and see what you recently played. For example, if you’re listening to a playlist, you can choose an album to switch to after the song currently playing finishes. When the album finishes, Music resumes playing the playlist.
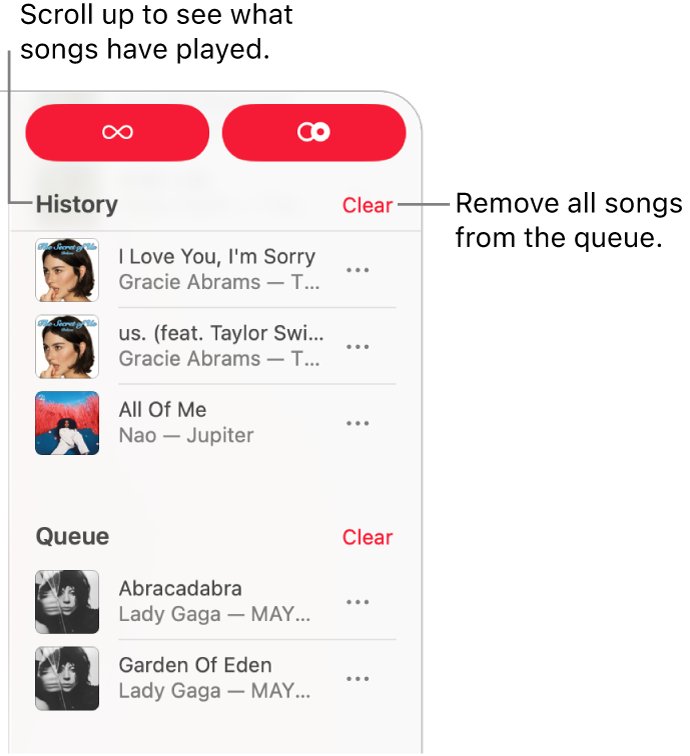
Use the queue
Go to the Music app
on your Mac.Play music from your library, Apple Music, or a CD.
Note: A song needs to be playing before you can use the queue.
Click
 , then double-click a song to play it and the songs that follow.
To reorder the list, drag the songs.
Click the Playing Next button again to close the queue.
Use AutoPlay
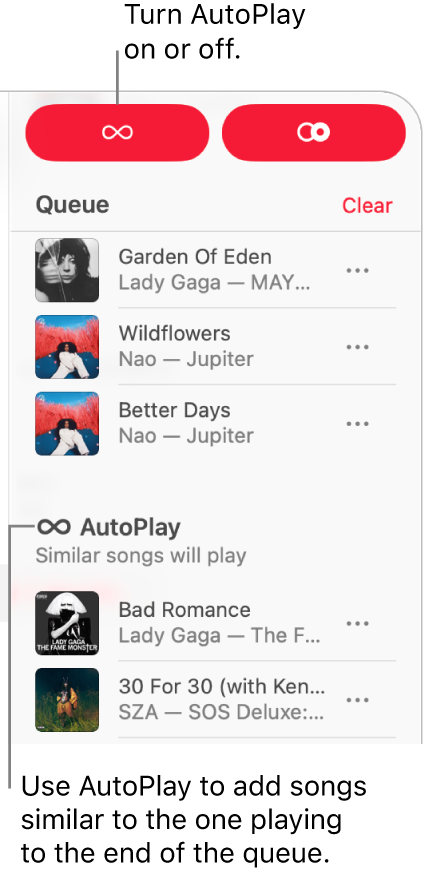
If you subscribe to Apple Music and you’re not sure what to play next, use AutoPlay. Once you play something, AutoPlay adds similar songs to the end of the queue. When AutoPlay is on and a song is playing, the AutoPlay icon  appears red at the top of the queue.
Go to the Music app
on your Mac.Play music from your library, Apple Music, or a CD.
Note: A song needs to be playing before you can use the queue.
Click
, then click  at the top of the queue to turn AutoPlay on.
When AutoPlay is on, the button changes color. Click it again to turn it off.
Note: When you turn off AutoPlay on a device that uses your Apple Account—your iPhone, for example—AutoPlay is turned off on all other devices that use the same Apple Account.
Add music to and manage the queue
Go to the Music app
on your Mac.Browse music in Apple Music or your library, click the More button (it looks like this
 or this
  ), then do one of the following:
Add music to the beginning of the queue: Choose Play Next.
Add music to the end of the queue: Choose Add to Queue.
Click
, then do any of the following:Change the order of songs in the queue: Drag the songs into the order you want.
Remove a song from the queue: Select the song, then press the Delete key.
Remove all songs from the queue: Click the Clear link at the top of the queue.
Note: To clear part of the queue, click Clear next to an album or playlist.
Tip: To add a song or an album from your library to the queue, drag the item to the top center of the Music window until a highlighted border appears.

See what you recently played
Go to the Music app
on your Mac.Click
, then scroll up to the History section.
Turn on or off song transitions in the queue
Go to the Music app
on your Mac.Click
, then click  or
or  in the top-right corner to turn on or off AutoMix or Crossfade.
 To switch between AutoMix or Crossfade, see Change how music transitions.
If you quit Music, the queue is automatically saved for the next time you open Music.