
Create a document in Pages on iPad
To create a new document, you first choose a template to use as a starting point. Templates use coordinated fonts and colors for a unified look, and often include placeholder elements that you can replace with your own content.
There are two types of templates, depending on the type of document you want to create:
Word-processing: For documents that are primarily text, such as reports and letters.
Page layout: For documents with a more customized layout, such as books, posters, and flyers.
To quickly create a word-processing document or a page layout document, see the first two tasks below. To see more detailed formatting and design options (including formatting for another language), see the third task.
Create a basic word-processing document
Go to the Pages app
 on your iPad.
In the document manager, tap Choose a Template at the top of the screen to open the template chooser. If you don’t see Choose a Template, tap
 .
.If a document is open, tap
 in the top-left corner to go to the document manager.
Tap the Blank or Blank Landscape template in the Basic category.
Start typing.
A new page is added automatically as you reach the end of the page.
When you’re finished, tap
to close the document and return to the document manager.Pages automatically saves your changes as you work, so you don’t need to worry about consistently saving your document manually. However, it’s a good idea to rename your document so you can easily find it the next time you want to work on it. You can change the name of the document or change where it’s saved at any time.
Create a basic page layout document
Go to the Pages app
on your iPad.In the document manager, tap Choose a Template at the top of the screen to open the template chooser. If you don’t see Choose a Template, tap
.If a document is open, tap
in the top-left corner to go to the document manager.Tap the Blank Layout template in the Basic category.
Tap
 in the toolbar, then tap Text.
A text box is added to the page. In a page layout document, all text is contained in a text box.
Do any of the following:
Add text to the text box: Double-tap the text box to select the placeholder text, then type.
Move the text box: If text is selected, tap outside the text box to deselect the text, tap the text box again to select it, then drag the text box anywhere on the page.
Resize the text box: If text is selected, tap outside the text box to deselect the text, tap the text box again to select it, then tap the text box to show the blue resize handles. Drag a handle on the top, bottom, or sides to resize the text box horizontally or vertically, or drag a corner handle to resize it proportionally. If a clipping indicator
 appears at the bottom, drag it until all of the text is visible.
When you’re finished, tap
to close the document and return to the document manager.Pages automatically saves your changes as you work, so you don’t need to worry about consistently saving your document manually. However, it’s a good idea to rename your document so you can easily find it the next time you want to work on it. You can change the name of the document or change where it’s saved at any time.
Create and format a document
Go to the Pages app
on your iPad.Note: If you want to format table and chart data using the conventions of another language, choose the language before choosing a template. See Format a document for another language.
In the document manager, tap Choose a Template at the top of the screen to open the template chooser (shown below). If you don’t see Choose a Template, tap
.If a document is open, tap
in the top-left corner to go to the document manager.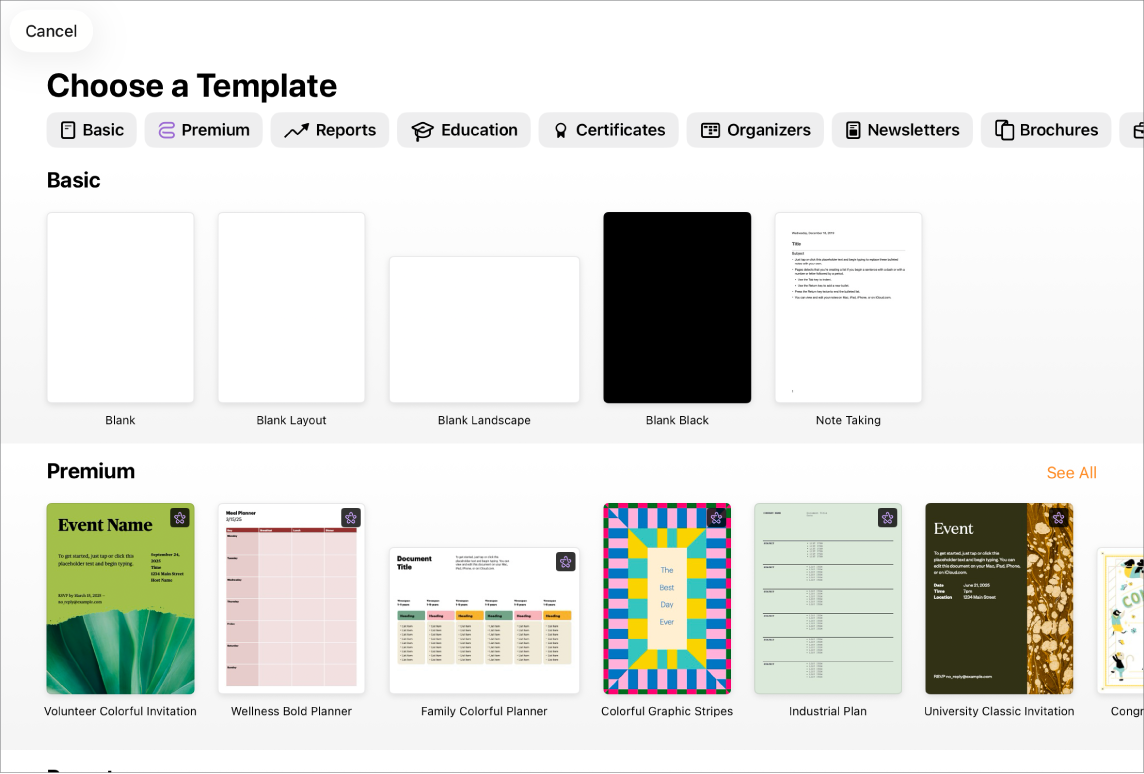
In the template chooser, tap category names at the top of the screen to view different templates, then tap a template to open it.
To see whether the template is for word processing or page layout, tap in a corner of the document (so no text or objects are selected), tap
 , tap Document Options, then tap Document Setup. If Document Body is turned on, it’s a word-processing document; if it’s not, it’s a page layout document.
Do any of the following:
Add or edit text: In a word-processing document, just begin typing. The blinking insertion point indicates where your text starts. In a page layout document, add a text box (see below), then type. To edit text, select the text, then type. To format the selected text, tap
 to open the text controls.
Replace placeholder text: Tap the placeholder text, then type your own. Some templates include placeholder text written in lorem ipsum (scrambled Latin), but the text you type to replace it appears in the language you use.
Add new text boxes, images, shapes, or other objects: Tap an object button in the toolbar, then choose the object you want to add. Text boxes are categorized as a shape in the Basics category.

Replace placeholder images: Tap
 in the lower-right corner of a placeholder image to choose an image of your own.
Add a page: In a word-processing document, a new page is automatically added as your typing reaches the end of a page. To learn how to add pages manually, and to add a page in a page layout document, see Add pages.
Undo or redo recent changes: To undo your recent changes, tap
 at the top of the screen. If you change your mind, touch and hold , then tap Redo.
When you’re finished, tap
to close the document and return to the document manager.Pages automatically saves your changes as you work, so you don’t need to worry about consistently saving your document manually. However, it’s a good idea to rename your document so you can easily find it the next time you want to work on it. You can change the name of the document or change where it’s saved at any time.