
Add, edit or delete categories in Numbers on iPhone
You can use categories to organise the data in your table. For example, if you have a spreadsheet that tracks shirt sales, you could create a category that groups sales by month or by salesperson.
There are two ways to create a category in Numbers: choose a source column of data that you want to group, or manually select rows that you want to group. Choosing a source column is best when your table already contains the data you want to group. Manually selecting rows works best when the data you want to group isn’t in the table. For example, you might have a table that’s a register of students in your class. If the students created their own groups for a science project, you could organise the roster by these groups without adding a “science project” column to the table.
A table can have one main category and up to four subcategories to create a hierarchy for your data. You can change this hierarchy, rename or delete categories, and more.
Create a category from a source column
If the data you want to use for a category is already in your table, you can select the column that contains the data (the source column), and Numbers automatically creates groups based on shared values in the column.
Go to the Numbers app
 on your iPhone.
Open a spreadsheet with a table.
Tap
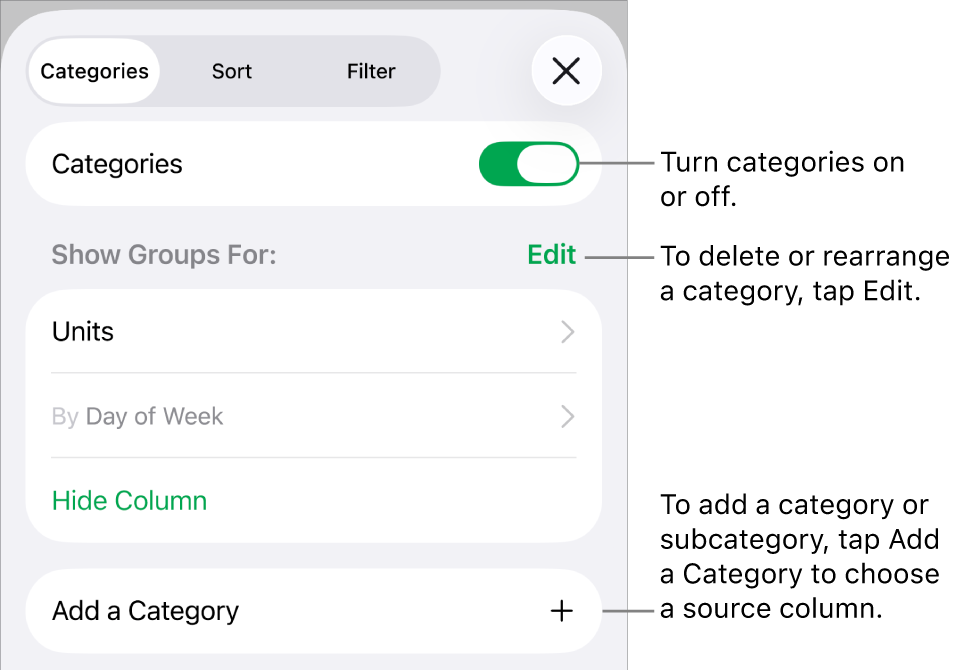
 , tap Categories, then tap Add a Category.
For example, if your table has data for shirt sales, you might choose the Sales Date column so you can see sales grouped by month.
Tap the column you want to use to create the category.
To add a subcategory, tap Add a Category and choose another column.
For example, in the shirt sales table, you could add a subcategory based on salesperson to view sales by month and by salesperson.
Tap
 to close the controls.
Create a category from a selection of rows
If there is no source column of data for the category you want to add, you can manually create categories by selecting rows you want to group. For example, for a table that lists universities you’re interested in, with columns for location, fees and distance, you might want to organise it by universities you want to visit. You could simply select the row for each university to manually create a category, so you wouldn’t need to add a column for it to the table.
You can also select rows in an already categorised table to create additional groups.
Go to the Numbers app
on your iPhone.Open a spreadsheet, then select the rows you want to group together in your table.
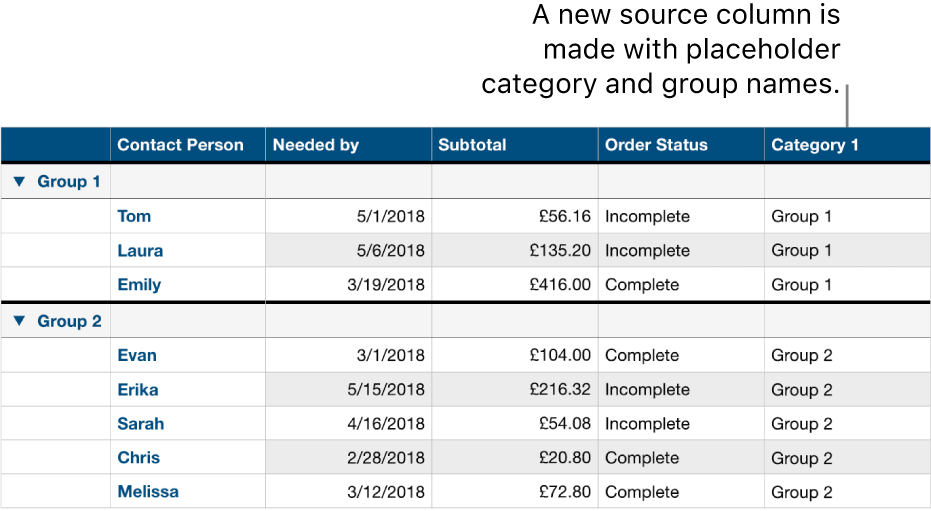
If there are no other categories in the table, a source column called Category 1 is added to the end of the table.
The groups are labelled Group 1 and Group 2; one for the data you selected, and one for the data you didn’t select.
If the table is already categorised, the new group is given a placeholder name in the existing source column (instead of creating a new category).
Change the hierarchy of the categories
If your table contains subcategories, you can move a category up or down one or more levels to reorganise your data. For example, if you have a table that categorises shirt sales by sale date and then by order status, you could reorganise to categorise by order status first and then by sale date.
Go to the Numbers app
on your iPhone.Open a spreadsheet, then select a table with categories.
Tap
, tap Categories, then tap Edit.Touch and hold
 next to the category you want to move, then drag it up or down.

Tap Done.
Hide or show a category source column
You can hide a category source column to reduce the amount of data shown in a categorised table. The table remains categorised by the data from the hidden column.
Go to the Numbers app
on your iPhone.Open a spreadsheet, then select the table.
Tap
, tap Categories, then tap Hide Column or Unhide Column next to the source column you want to hide.
If you turn off categories while a column is hidden, it remains hidden. See Hide or show rows and columns.
Rename a category
Go to the Numbers app
on your iPhone.Open a spreadsheet with a categorised table, then, in the source column, double-tap the cell with the name you want to change.
Note: The summary row label containing the category name can’t be edited.
Type a new name, then tap
 at the top of the screen to hide the keyboard.
Turn categories on or off
To go back to seeing your data uncategorised, you can turn categories off. You can turn them back on to see the data categorised again at any time, and your data is regrouped based on any edits you made while categories were turned off.
Go to the Numbers app
on your iPhone.Open a spreadsheet, then select a table with categories.
Tap
, tap Categories, then turn Categories on or off.
Delete a category
You can delete a category so your table is no longer grouped by its data (the data itself remains in the table). When you delete a category that has subcategories, the subcategories move up in the hierarchy.
Go to the Numbers app
on your iPhone.Open a spreadsheet, then select a table with categories.
Tap
, tap Categories, then tap Edit next to Show Groups For.Tap
 next to the Category you want to delete, then tap Delete.
If other categories are still used in the table, tap Done.
Tap
to close the controls.