Export data to a data warehouse
Automate data exports from Stripe to Snowflake, Redshift, Databricks, or BigQuery.
Data Pipeline supports data exports from Stripe to:
- Snowflake (deployed on AWS, Azure, or Google Cloud)
- Amazon Redshift
- Databricks
- BigQuery
Availability
Data Pipeline is available in the following AWS regions. BigQuery uses GCP regions.
| AWS Region | Snowflake | Amazon Redshift RA3 (with encryption) | Databricks |
|---|---|---|---|
| us-west-2 (Oregon) | |||
| us-east-2 (Ohio) | |||
| us-east-1 (N. Virginia) | |||
| us-west-1 (N. California) | |||
| ca-central-1 (Central Canada) | |||
| sa-east-1 (São Paulo) | |||
| eu-central-1 (Frankfurt) | |||
| eu-central-2 (Zurich) | |||
| eu-west-1 (Ireland) | |||
| eu-west-2 (London) | |||
| eu-west-3 (Paris) | |||
| eu-north-1 (Stockholm) | |||
| me-south-1 (Bahrain) | |||
| ap-southeast-1 (Singapore) | |||
| ap-southeast-2 (Sydney) | |||
| ap-southeast-3 (Jakarta) | |||
| ap-northeast-1 (Tokyo) | |||
| ap-northeast-2 (Seoul) | |||
| ap-northeast-3 (Osaka) | |||
| ap-east-1 (Hong Kong) |
BigQuery regions
BigQuery uses GCP regions instead of AWS regions. Data Pipeline supports all BigQuery locations except asia-south1 and asia-south2 due to data localization requirements.
Get started
- In the Stripe Dashboard, go to Reporting > Data management.
- Complete the onboarding steps. You can only connect one warehouse account to your Stripe account at a time.
After you accept the data share and finish onboarding, your core Stripe data is available in your warehouse within 12 hours. After the initial load, your data refreshes regularly.
Onboard
Link your Snowflake account
First, send all your up-to-date Stripe data and reports through the Dashboard:
- On the Data Pipeline settings page in the Dashboard, click Sign up.
- From the drawer, select Snowflake, then click Continue.
- Enter your Snowflake Account Identifier, and then select the cloud provider on which your Snowflake account is deployed (AWS, Azure, or GCP).
- Select your region, and then click Next.
- Copy the SQL from the code block and insert it in a SQL worksheet in Snowflake warehouse and run the query to retrieve the unique value. Enter the value in the text box and click Subscribe.
Access your data share in Snowflake
After your core Stripe data becomes available (typically within 12 hours), access your data from your Snowflake account:
Navigate to your Snowflake account to accept the Stripe data share.
If your Snowflake cloud provider is deployed on AWS in one of these seven regions:
us-east-1: accept share from accountGSWUDFY_STRIPE_ AWS_ US_ EAST_ 1 us-west-2: accept share from accountJZA07263us-east-2: accept share from accountVM70738ca-central-1: accept share from accountTD26747eu-central-1: accept share from accountGSWUDFY-STRIPE_AWS_ EU_ CENTRAL_ 1 eu-west-1: accept share from accountGSWUDFY-STRIPE_AWS_ EU_ WEST_ 1 ap-southeast-2: accept share from accountKB26084
In Snowflake, have a user with
ACCOUNTADMINaccess go to Data > Shared Data. Under Ready to Get, go to the share calledSHARE_from the corresponding Stripe account. Then, click Get shared data to accept the share.[ACCOUNT_ IDENTIFIER] If your Snowflake cloud provider isn’t AWS, or if your AWS region isn’t one of the seven regions listed above:
- Your share comes from the
JZA07263account as a private listing. - In Snowflake, have a user with
ACCOUNTADMINaccess go to Data Sharing > External Sharing. - Locate the share from
JZA07263and follow the instructions as prompted by Snowflake.
- Your share comes from the
In the modal that opens, give the database a name (for example, “Stripe”), select the roles to grant access to (for example,
SYSADMIN), then click Get Data.Confirm that you can view your Stripe data in Data From Direct Shares and Databases. You can now query your Stripe data directly in Snowflake.
Change the warehouse account
To switch to a different warehouse account:
- Turn off Data Pipeline on the settings page.
- Sign up again using the new warehouse account details.
To add another Stripe account to the same warehouse:
- Follow the signup steps for the additional Stripe account.
- Use the same account identifier from your initial setup. To find it, go to the settings page and locate ID under Connected data warehouse.
Query Stripe data in your data warehouse
In Snowflake, Amazon Redshift, Databricks, and BigQuery, your data is available as secure views. To query your data, follow the steps below.
View your available Stripe data by navigating to Views in the database you created. For each table, you can also see the available columns by clicking on the table and navigating to Columns.
Financial reports in Data Pipeline
Financial reports aren’t available for Amazon Redshift, Databricks, or BigQuery. To facilitate your financial close, you can access Stripe’s reports directly in your data warehouse.
Financial report templates have a FINANCIAL_ prefix and are available as views in your data warehouse.
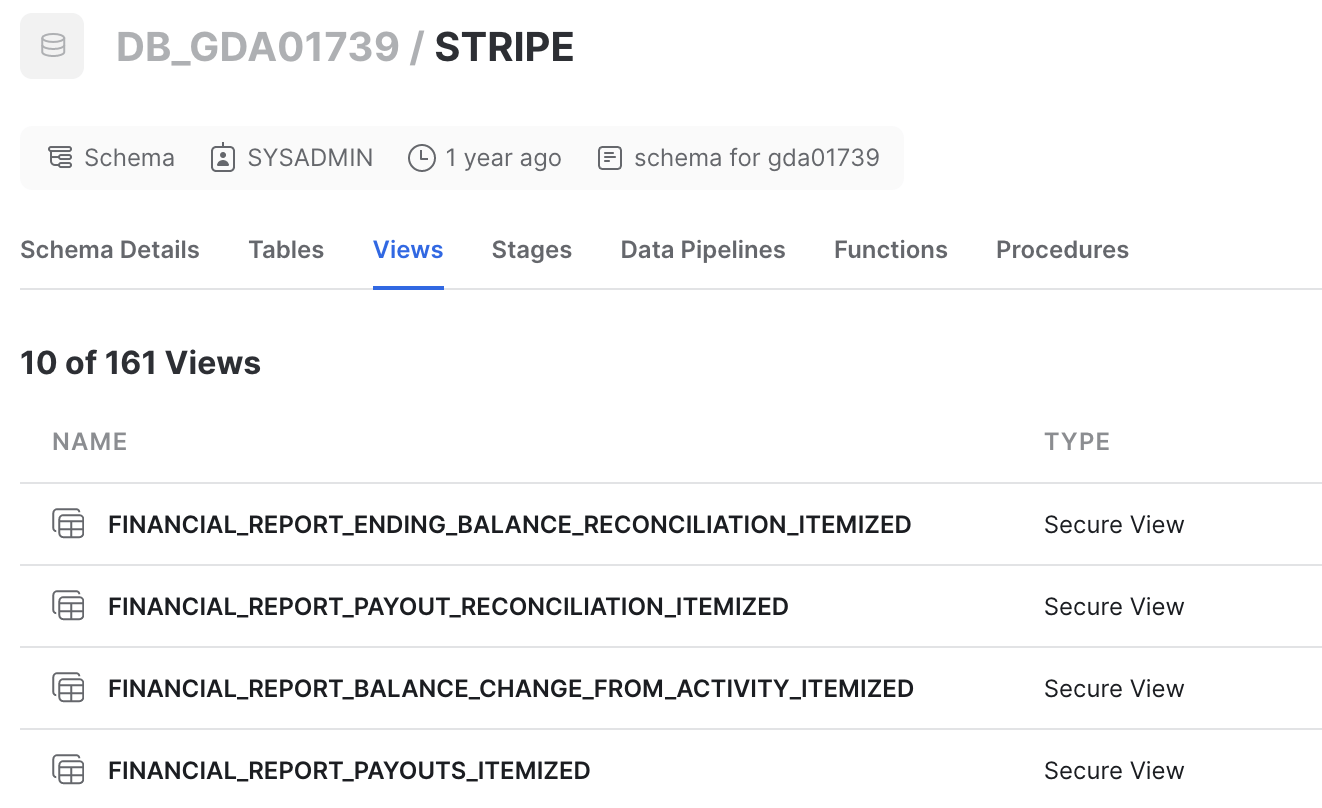
Generating financial reports in Snowflake
Generating financial reports from Data Pipeline requires setting a few custom variables. These are the same variables you set when generating the report through the Dashboard or API:
START_(varchar)—The starting date of the report (inclusive).DATE END_(varchar)—The ending date of the report (exclusive).DATE TIMEZONE(varchar)—The time zone of non-UTC datetime columns.
You can format your dates with varying levels of precision:
START_= ‘2021-09-01’;DATE START_= ‘2021-09-01 00:00:00’;DATE START_= ‘2021-09-01 00:00:00.000’;DATE
To set these variables and run the report query:
Create a new worksheet.
Set the database schema and required variables to your desired values.
-- set schema based on the name you gave your Stripe database
use schema db_name.stripe;
-- set financial report template variables
set (TIMEZONE, START_DATE, END_DATE) = ('UTC', '2021-09-01', '2021-10-01');
Run these lines of code separately before attempting to query tables that require them. Otherwise, you might receive an error that a session variable doesn’t exist. If you use the Snowflake Connector for Python, set the session parameter
TIMEZONEwith theALTER SESSION SET TIMEZONE = 'UTC'command.After running the code that sets the necessary variables, query the view of the report you want to generate. For example, running:
select * from FINANCIAL_REPORT_BALANCE_CHANGE_FROM_ACTIVITY_ITEMIZED;Returns the same results that the itemized balance change from the activity report displays in the Dashboard or through the API:

Need support for a different file format?
If you want to upload files with a different structure or in a custom format, contact Stripe support.