Introduction
In this tutorial, you'll work through a backlog of Code Quality findings on your default branch, prioritize by risk, resolve the highest-impact findings, and communicate the result to stakeholders. You'll learn:
- How to read the dashboard and understand what your scores mean.
- How to prioritize remediation and decide whether to apply an autofix, delegate to Agent cloud Copilot, or dismiss a finding.
- How to communicate the impact of remediation work.
- What additional measures you can take to prevent the backlog from growing again.
This is a guided walkthrough, so it favors understanding over speed. For the basic steps of generating an autofix or dismissing a finding, see the companion how-to: Fixing code quality findings in your repository backlog.
Before you start
- Code Quality is enabled on a repository you own or maintain. See Activation de GitHub Code Quality.
- If you enabled Code Quality recently, wait a few minutes for the initial CodeQL scan of your default branch to complete.
Throughout this tutorial, we'll use a running example: a repository whose dashboard currently shows scores of "Reliability: Poor" and "Maintainability: Fair" for code quality.
Step 1: Assess your current score
- Accédez à l’onglet Security and quality de votre référentiel.
- Cliquez pour développer Qualité du code, puis cliquez sur Résultats standard.
Here you'll see scores for Reliability and Maintainability.
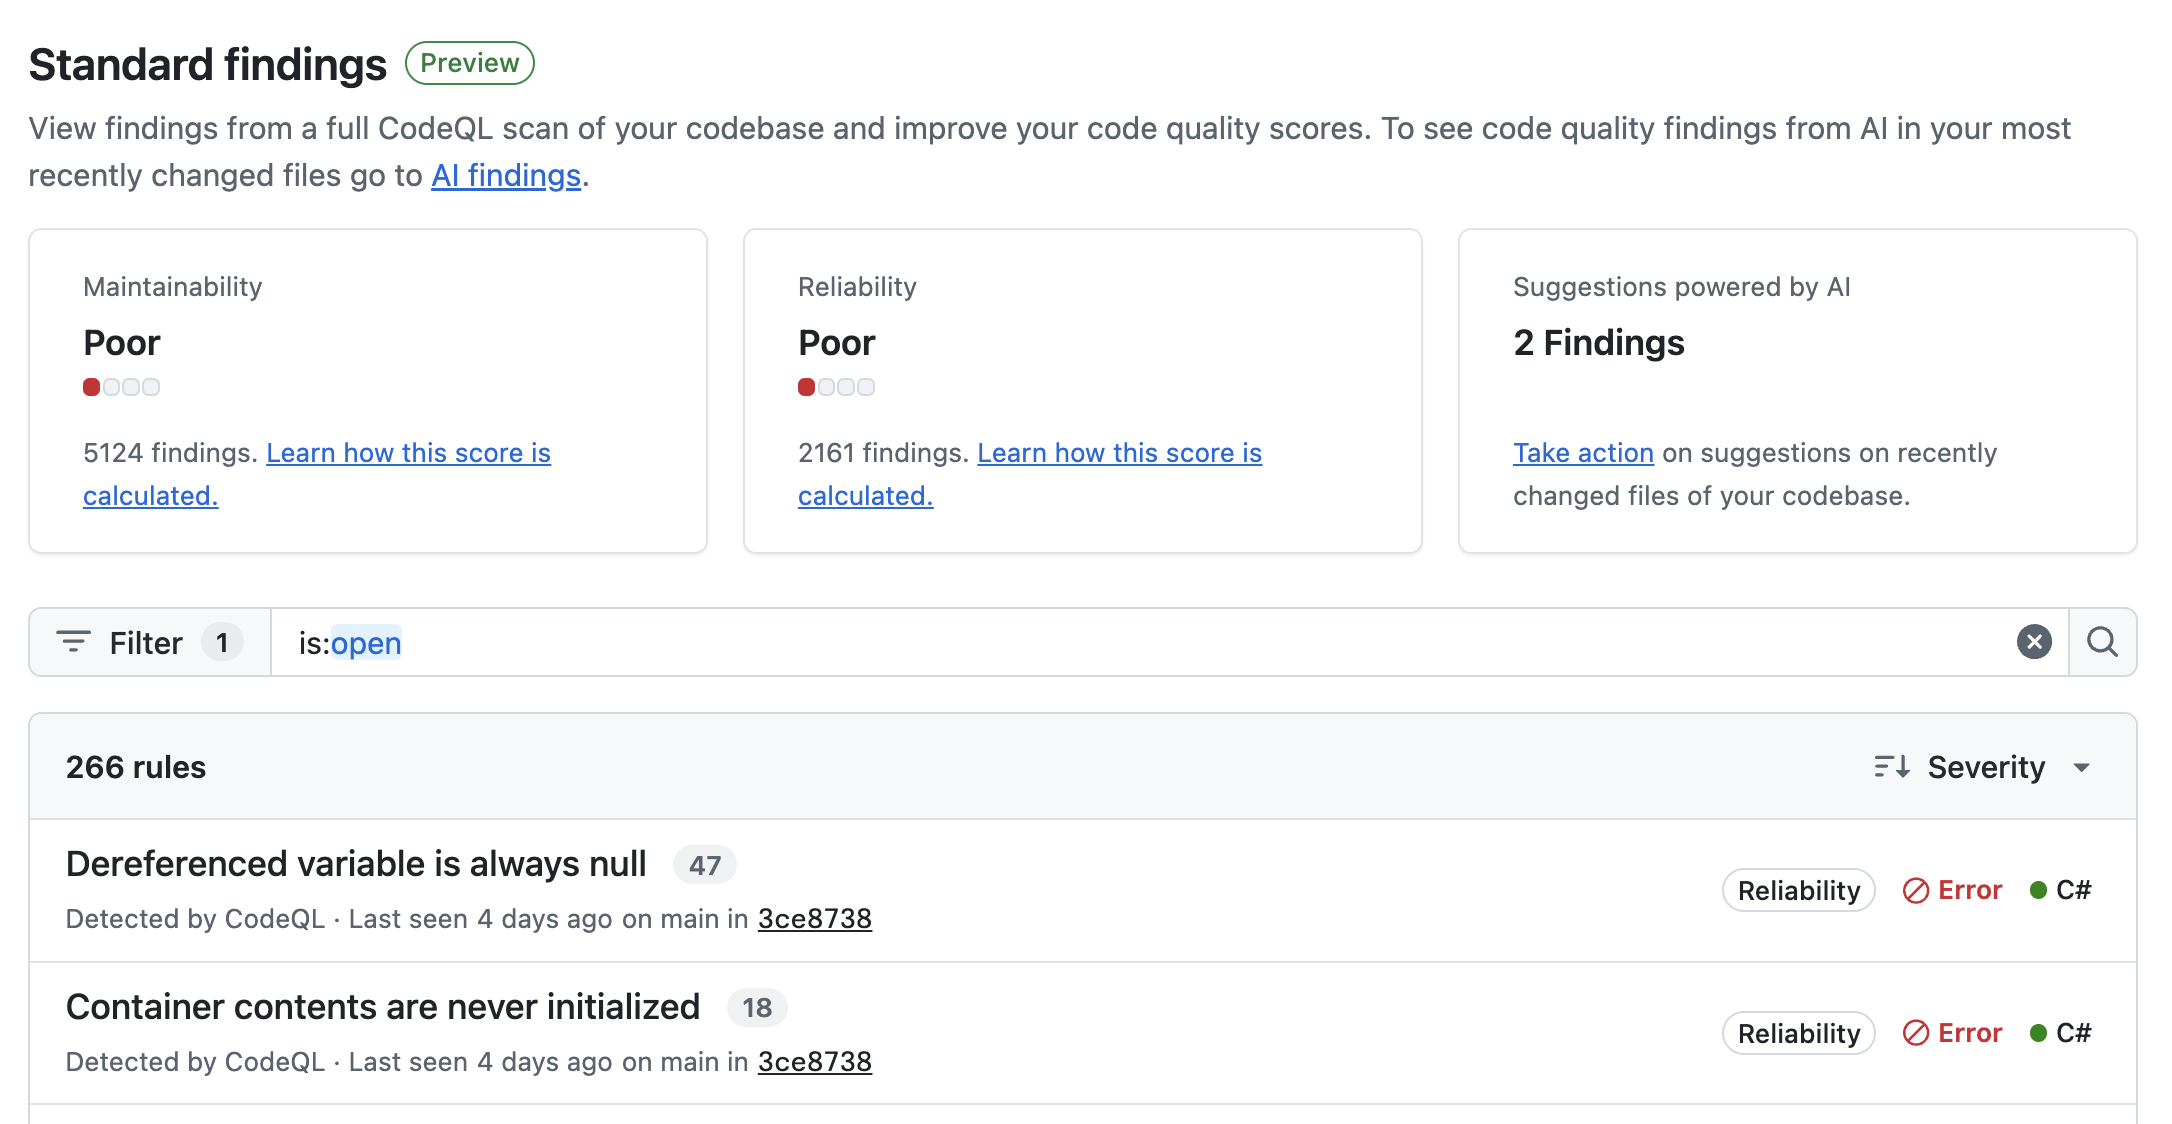
These scores are calculated from the findings on your default branch:
| Metric | Definition | Example findings |
|---|---|---|
| Reliability | Assess whether the code performs its intended function correctly, predictably, and consistently. Reliable code is free from bugs, handles errors safely, and operates as expected under normal and edge-case conditions. | Issues with performance, concurrency, error handling, correctness |
| Maintainability | Assess how easy it is to understand, modify, and extend the code over time. Maintainable code follows best practices, avoids unnecessary complexity, and is organized for ease of future changes and collaboration. | Unused/dead code, readability, complexity, conflicting naming, poor separation of concerns |
Each score is determined by the highest severity of finding still present for that metric. To raise a score, you have to clear every finding at the current highest severity level.
In our example, Reliability is "Poor" because there are still Error-level findings affecting reliability. Warnings and Notes are worth addressing, but until the Errors are cleared they can't move the score.
Step 2: Read the list by rule and focus on the highest-impact findings
In the Résultats standard view, findings are grouped by rule. This is useful to understand because a single rule with many findings may reflect one repeated coding habit. Once you understand one occurrence, it may be easier to understand the proposed autofixes for all of them, which makes remediation faster and easier to review in bulk.
In addition, look for rules that would complete a severity tier for one of your scores—if clearing a rule removes the last remaining "Error" affecting Reliability, your score moves up immediately.
In our example, one rule—"Overwritten property"—accounts for 40 of the 128 findings, and all 40 are Error-level. Clearing it would remove every Error-level finding affecting Reliability, which would move our score up to the next bracket.
Step 3: Resolve the findings
Once you've picked a rule, decide how to handle each finding:
| Assessment | Recommended action | Notes |
|---|---|---|
| The finding is legitimate. | Click Generate fix and open a pull request | Clicking Generate fix consumes AI credits. You can add multiple autofixes to the same branch to group remediation work in one pull request. |
| The finding doesn't apply. For example, it's in legacy code, an intentional pattern, or a false positive | Click Dismiss. | The finding is considered resolved and removed from the list of open findings. |
In our example, we generate autofixes for the 40 "Overwritten property" findings and open a pull request. Because they share a single pattern, the fixes are nearly identical. We merge the pull request once CI checks pass.
Step 4: Communicate impact
After you've merged your remediation, return to the "Résultats standard" view and capture:
- The score that changed. For example, Reliability: Poor → Fair.
- The requirement that unlocked it. For example, all Error-level findings affecting reliability now resolved.
- The reduction in open findings. For example, from 128 open to 88.
In our example, clearing the "Overwritten property" rule moves Reliability from Poor to Fair—the first score improvement the team can point to.
How this connects to the rest of your code health
Every finding you resolved today can reappear tomorrow if new pull requests introduce the same kinds of issue. To stop the backlog regenerating:
- Set a merge threshold on your default branch to block pull requests that introduce new code quality findings. See Définition des seuils de qualité du code pour les pull requests.
- Fix findings in the pull request when they appear. See Preventing code quality issues from reaching your default branch.
Troubleshooting
- Scores didn't move after merging fixes. At least one finding at the current highest severity level for that metric is still open.
- The scan hasn't re-run. Code Quality scans run automatically after every push to the default branch. Wait a few minutes for the workflow to complete.
Conclusion
In this tutorial, you assessed your repository's quality scores, prioritized backlog work by severity and rule, resolved findings using autofixes, and communicated the outcome as a score movement.
Next steps
- Reduce technical debt further by fixing findings in recently changed files. See Fixing code quality findings in recently merged files.